In the last lesson, you learned how to draw shapes on the screen. In this lesson, we’re going to learn how to make your game interactive and animated.
Using these skills, you’ll be able to build things like this!

The above animation was actually built using Processing. You can see more cool art people have built with Processing here.
Animations
Setup
Let’s start with the setup of your program. Go ahead and add these lines to your code:
def setup():
	size(600, 600)
The setup function holds all the code we want to run right when the program starts – ie: all the setup. All of the code in the setup() function runs only once. Notice that we’re just using it to organize the code previously written to initialize the background. You can read more about the setup function here.
The Draw Loop
Let’s get to the interesting part: The draw loop. This allows us to add animation to our project. The way that the draw loop works is that all the code inside of it will run over and over again, approximation 60 times per second.
Let’s try an example. Try adding this to your code.
def draw():
	print("StreetCode is awesome!")
When you run it, you should see something like this:

This is because the code:
print("StreetCode is awesome!")
is getting repeated over and over since it is in the draw loop.
You can think of the draw loop like the loops we learned about before. But it is an “infinite” loop. Unlike a for loop, which runs for a specified number of times, or a while loop, which runs until a condition is False, the code inside the draw loop runs until you stop your program.
The Draw Loop with Variables
Let’s try a different example. Try replacing the code you just wrote with this.
x = 0

def draw():
	global x
	print(x)
	x = x + 1
Before you run that, let me explain the line:
global x
This probably doesn’t make sense at the moment. What this line of code is doing is telling the code below it in the draw function to treat the variable, x, as a global variable. You can read about what global variables are here. Pretty much, global variables are variables that can be accessed through all of your code instead of in just one function.
Make sure to talk it over with a mentor if it doesn’t make sense because we’ll be using these a lot.
Before you run your code, see if you can figure out what it will print, then go ahead and run it.
Were you right? Talk with a mentor and see if you can make sense of what happened.
Animating Shapes
Okay, now for the cool part. Try replacing the code you had with this:
x = 0
def draw():
    global x
    rect(x, 20, 15, 15)
    x = x + 5
Your code should now look something like this:

When you run it, you should see something like this:

Great! Now we have a square moving, but what’s up with the trail of squares left behind by it?
This is because the screen doesn’t automatically refresh each time – anything you draw just gets added to what’s already been drawn! To get rid of that, we’ll need to add this line of code to our draw function:
background(0,0,0)
This works because the background command will cover the whole screen in a background, eliminating the past drawings left from previous frames.
If you run it now, you should see something like this:

Awesome! We have our moving square. If you remember the fill function from last lesson, you can try messing with the color of the square as well.
Why does this all work? If you remember in the previous examples, since the code in the draw loop repeats over and over and is adding to the variable, x each time. This causes the square to get drawn further to the right each time since the variable, x , controls the x position of the square.
Go ahead and talk this over with a mentor or partner if it doesn’t make sense.
Exercises
Exercise 1
We just walked together through the process of making a square move to the right. Now, see if you can make the square move downwards instead.

Exercise 2
After that, you can try moving the square diagonally.

Challenge Exercises
- Change the angle that the square is moving diagonally at.
- Try to move multiple shapes at once, but at different speeds.
- Make a finish line (draw a new long skinny rectangle), and have the box stop at the finish line.
Mouse Events
In many games you play, you use the mouse! Many games involve using the mouse for shooting, picking up powerups and more. Here, we’ll start learning how to make our programs interact with the mouse in Processing.
Make Shapes Follow Your Mouse
First, let’s try to move a rectangle around with the mouse. Let’s look back at how to make a rectangle in Processing.
rect(x,y,width,height)
As a reminder, we’d replace each of the parameters with the numbers/variables we want those values to equal when we’re drawing a rectangle.
If we want the rectangle to follow the current position of the mouse, we’ll have to track its X and Y coordinates. Luckily we Processing has two special variables tha can help us with this: mouseX and mouseY.
Here’s how they work: at any time, the variable, mouseX will equal the X coordinate of the mouse, while mouseY will equal the Y coordinate of the mouse.
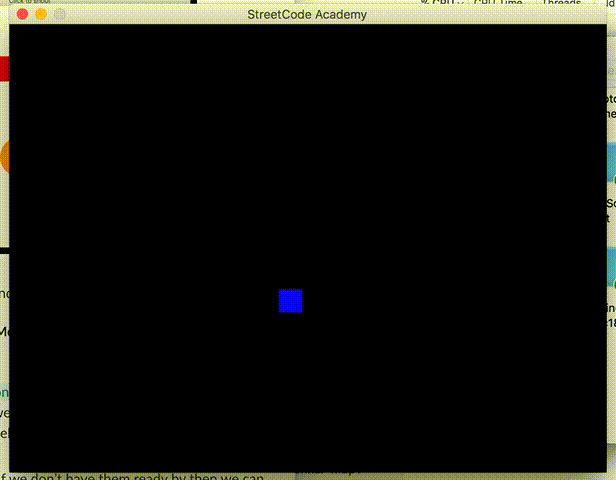
This means we can use these to make a rectangle follow our mouse around the screen. Try pasting this code into your window and running it.
def draw():
	background(0,0,0)
	rect(mouseX,mouseY,15,15)
and you should see something like this:

Make things happen when you click
Now, let’s find out how to make things happen when the user clicks the mouse. To do that, we’ll need to learn how to use the mouseIsPressed variable. To illustrate that, we’ll code an example where we’ll change the background color whenever we click.
Let’s modify our code to look like this:
def draw():
	background(0,0,0)
	if mousePressed:
		background(255,0,0)
	rect(mouseX,mouseY,15,15)
Now when you run your code, you should see something like this:

Code Deep Dive
if mousePressed:
    background(255,0,0)
Here, the mousePressed variable is only True when your mouse is held down. Since this is in an if statement, the background will only change if the mouse is pressed.
Exercises
Exercise 1
See if you can modify your existing code such that whenever you hold down the mouse button, you see a circle instead of a square.

Hint 1: The first time you try this, you might see both a circle and a square. To solve this problem, you might need to use an else statement with your if statement. If you either haven’t learned what an else statement is yet or forgot, you can read about how they work here. Be sure to talk it over with a mentor if it doesn’t make sense.
Challenge Exercises
- Try to change the color of the shape as well when you click, but have the shape become white after you release the mouse.
- Make it so that the shape becomes a different color if you click the right versus left mouse button. Hint: learning how to use mouseButton will be useful for this.
- Make it so that the shape stays on the opposite side of the screen from your mouse and moves in the opposite directions.
As always, feel free to experiment and try something new. If you want to learn more about what you can do with the mouse, feel free to look at the Processing reference manual.
Keyboard Events
Review
Alright, now we’ve learned how to make objects not just move, but also respond to the user’s mouse. Next we’ll learn how to use the keyboard to manipulate the rectangle.
First, let’s start by pulling up some of the code we wrote in the first section. If you didn’t have it saved from before, you can go ahead and paste this code into your editor:
def setup():
	size(600, 600)

x = 0

def draw():
    global x
    background(0,0,0)
    rect(x, 20, 15, 15)
    x = x + 5
and run it just to make sure it works.
As a quick review, in this exercise, the line of code:
x = x + 5
is responsible for moving the square. That’s because each time the draw loop repeats, this line of code adds 5 to the variable, x, which is used to control where the rectangle’s X coordinate is.
Responding to Keys Pressed
Now, let’s introduce a special variable in Processing that’s actually very similar to the mousePresed variable we learned about earier.
This variable is called keyPressed, and in the same way that mousePressed is true whenever the mouse is pressed, keyPressed is true whenever any key on the keyboard is down.
Now, let’s modify the code we wrote earlier to look like this:
def draw():
	global x
	rect(x, 20, 15, 15)
	if keyPressed:
		x = x + 5
How do you think this will change things? When you ran it, did it have the result you thought?
Similar to our mousePressed example, the if statement:
if keyPressed:
	x = x + 5
makes it so that the code:
x = x + 5
runs only when keyPressed is True. That means the square will only move when the user presses a key down. Feel free to talk it through with another student or a mentor if this doesn’t make sense.
Responding to Specific Keys Pressed
Now, keyPressed will be true when you press any key on your keyboard. The key could be the up key, down key, d key; any key will make the rectangle move.
However, what if we want the rectangle to move to the right only when we press the right key? To do this, we’ll have to introduce another special variable in Processing: the keyCode variable.
We’ll also have to use something called a nested if statement – pretty much, an if statement inside of an if statement.
Try modifying the if statement to look like this:
if keyPressed:
	if keyCode == RIGHT:
		x = x + 5
Now, the program will first run through the first if statement which is the if keyPressed:, then if the condition is true, it will run through to the second if statement which is the if keyCode == RIGHT: statement.

Like keyPressed, keyCode is a special variable that will tell us what key was pressed. We can check if it was UP, DOWN, LEFT, or RIGHT using those directions spelled out exactly like that in all caps.
To detect letters being pressed, the easiest way would be to instead use the key variable, which works just like the keyCode variable, except for keyboard letters (‘a’, ‘z’ etc.) instead of keyboard directions (UP, DOWN, LEFT, RIGHT).
Exercises
Exercise 1
Congrats on getting the right arrow key working with movement!
Now let’s see if we can make the rectangle move in all 4 directions as shown below. Modify the code from above to make the rectangle move in all four directions.
Once you’re finished, you should be able to do something like this:
Challenge Exercises
- Make your square change to a random color by pressing a certain key. You’ll want to use the same functions you used in Lesson 1: Drawing in the Animation section, Exercise 3, to fill the square with a random color.